Here's what actually works. First, I used an angle grinder and 40-grit flap discs to remove the paint and oxidized crap from the outside of the channel. I got it as smooth as I could, but there are many pitted areas, so the end result is far from smooth.
Next, I used a reciprocating multi-tool:
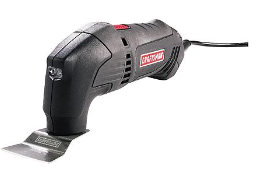 and a plunge cut blade like this:
 I then had to choose a material to re-seal the freshly-opened gap between the channel and the hull. I first tried Life-Calk liquid. My hope was that it would be runny enough to seep into the gap. It was too thick: it just lay along the top of the gap without penetrating at all. I then tried low-viscosity epoxy (Total Boat Penetrating Epoxy). I was thin enough to run down into the gap! I don't know exactly how far, but it certainly went down as far as I had been able to clean out - between 0.5 - 1.0 inches. A nice plus with this material is that even when fully cured, it remains just slightly flexible. My hope is that whatever minute flexing there may be along the H-D joint won't crack the epoxy.
The low-viscosity epoxy would only work along the top of the channel, because there's no way to force it up against gravity along the lower edge. For that, I used regular epoxy with thickened with silica cabosil to the consistency of peanut butter. I used a wooden tongue depressor to push the epoxy up into the crack, then ran the curved end along to produce a fillet. I know this will not be as solid a seal as the top edge, but my main leakage problem related to rainfall -- and waves breaking over the bow and washing over the deck. I don't often have my lee rail under water, so it is very rare to have water forced upwards onto the H-channel.
To finish things off, I used fairing compound (similar to Bondo, but designed for marine use). I coated the outside of the H-channel to seal the aluminum, and continued it onto the hull above and below the channel. I used a tongue depressor to produce a broad fillet between the channel and the hull.
When I tried out the fairing compound, I realized I had to do additional prep on the upper (deck) side of the joint. Here the PO had painted over the gel coat, and the several coats of blue paint was loose in many spots. I therefore used my angle grinder and 40-grit flap discs to remove the old paint between the top of the channel and the turn of the deck. This is a stripe about 1 1/4" wide all along the top of the channel. I ground down into the gel coat (and in some places all the way to the laminate). I covered this all with the fairing compound to produce a nice smooth surface. All this will take a lot of sanding and several additional thin coats of fairing compound, but the end result, when painted, should look very nice.
The main problem with this technique was the runny epoxy. I applied it with large syringes to try to confine it to the gap, but it always overflowed and ran down the outside of the channel. The stuff also ran out of the screw holes (where the decorative strips had been attached). It's very runny, and drips down the channel -- and onto my lovely AwlGrip hull! Waaaaah. If you wait till the stuff cures, you can use a razor blade to carefully lift the epoxy runs off the hull, but it's painstaking work. I needed a way to avoid getting the stuff on the hull.
DUH! you say. Just cover the hull with a wide poly drop-cloth taped to the channel at the top. Tried that. The damn poly would detach from the masking tape and fall away about half the time -- just as I was applying the epoxy to that section, of course. So I needed a different method.
 My (ahem) brilliant solution was to attach lengths of 3/4" (inside diameter) PVC tubing right along the middle of the channel. I held the tubing in place with pieces of masking tape about every three feet or so. The tubing is quite light, so it held just fine. I then ran 2-inch masking tape along the channel and over the top of the tubing, forming a sort of shed. As you can see, the drips of epoxy run out over the tape, down the tube, and drip off the bottom of the tube -- 1/2" clear of the hull. Not a drop hit the hull! After doing the starboard side this way, I hit upon an improvement: the final word in using low-viscosity epoxy to seal an H-channel hull-deck joint. Before attaching the tubing, run 2-inch masking tape along the top of the channel, with half the width on the channel and half on the surface of the hull (actually, it's the deck piece above the channel, but I'll just call it the hull). Then attach the tubing as before.
The upper gap is now sealed with the tape, so you need to pry it open. Do this carefully, and you create a trough between the tape and the hull, as shown here. You can now use the syringe to apply the liquid epoxy, and it seeps down nicely into the gap -- and the overflow just stays in the trough! This is doubly wonderful: first, very few drips, and second, the excess forms a reservoir -- like a long ditch full of liquid epoxy. As the epoxy works its way into the gap and seeps down into wherever it can, the excess in the trough provides additional material. Yes, when the epoxy hardens, you have a long strip of material that has to be removed, but the angle grinder and flap disc make short work of that.
What's especially nice about this trough is that you can use fast-set hardener and mix up enough material to do the entire side of the boat in a single batch. Use a big fat syringe (I got the biggest one Jamestown sells). Mix up about 8 oz of resin and 4 oz of hardener (2:1 ratio), and work fast. Fill and refill the syringe, running it along the trough as fast as you can crawl along on your knees. You can do this so fast, the big tub of material doesn't have a chance to cook off -- which it would do very quickly due to exothermic processes. I did the entire port side of the boat in about 5 minutes (after many hours of prep work, of course).
After I applied the epoxy, I used a tongue depressor to push the epoxy down into the gap, just in case trapped air might be keeping the material from seeping in.
I started work on Saturday morning, and by Monday afternoon I finished the top edges of the channel on both sides of the boat, and about 5 feet of the fairing work done. That includes all the grinding and other prep work. I didn't have time to do the bottom edge of the channel before a big line of thunderstorms rolled in. It rained TORRENTS for a couple of hours, then moderate to heavy rain all night long. In the morning, I checked inside the boat. NOT A DROP OF WATER ANYWHERE! I'll do some more testing with a garden hose after I finish the bottom edge of the channel and the fairing.
I figure I still have about 20 hours of work to finish completely. When I have the fairing all nice and smooth, I will paint the channel blue to match the original. I will not re-attach the stainless trim strips, because the screws just provide more ways for water to get in. I think just the blue paint will look fine. I can always add a rubbing strake sometime in the future if I want to really dress things up. But I'll see how I like the plain paint first.
I am so glad to have this hull-deck joint problem solved: it means I can complete the interior refitting without worrying about everything being ruined by sheets of water running down the inside of the hull, which is what was happening before.
Of course, the real test will be how long the fix will last. Unless the epoxy cracks, it should be pretty much permanent. We shall see.